We went strawberry picking at a u-pick local strawberry farm a couple of weekends ago with some other families. We took our picking seriously and I came home with two baskets filled to the brim with perfectly ripe strawberries.
It happened that one of the families was having brunch with us the next morning and taking advantage of our time together we combined our harvest and made two batches of gorgeous and delicious strawberry jam. The first batch was a basic strawberry jam; the second batch a much more exotic strawberry jam with balsamic vinegar and pink peppercorns.
")
")
")
")
With many hands, a little work yielded lots of fun in the kitchen and 20 jars of jam ready for gifting, eating, and storing. Yet despite our productivity, on Monday morning I still had an entire basket of strawberries. I thought about freezing the remainder, but thought better of it and decided to can one more batch of jam.
")
")
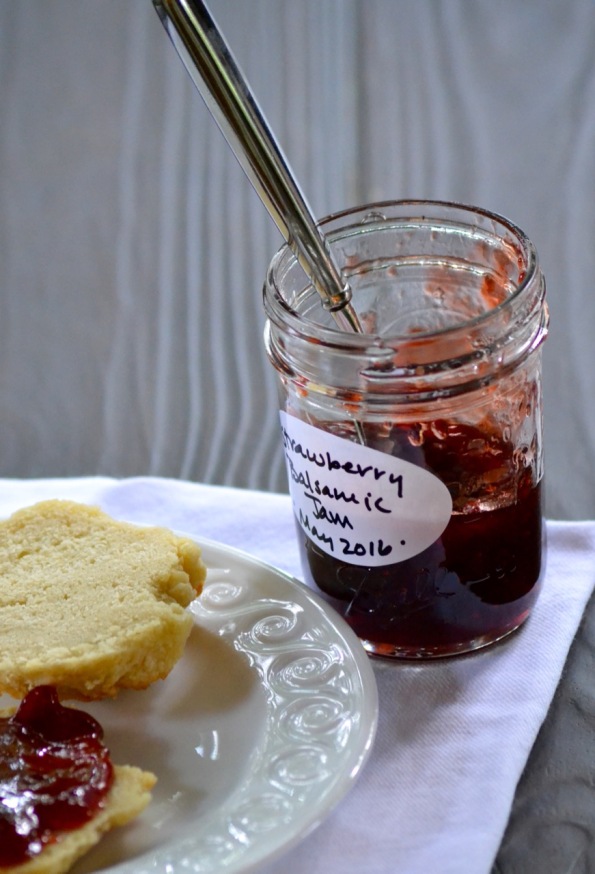
For this final batch, I wanted to make a jam that was a little more sophisticated than just strawberries and sugar, but not so fancy (i.e. pink peppercorns) that it couldn’t be used for PB&J’s (a favorite in our home). This strawberry jam with balsamic jam strikes just the right balance and is the perfect way to make strawberry season last a bit longer in your home. Happy cooking!

Strawberry and Balsamic Jam – Printer Friendly Recipe
Adapted from Canning magazine. A special interest publication from Better Homes and Gardens
Makes 9 half-pint jars of jelly
Several years ago, I made an impulse buy in the check-out line at the grocery store. Better Homes and Gardens had a special interest Canning publication. In the years since I purchased it, its pages have become dog-eared and splattered by frequent use and my pantry has reaped the benefits.
The magazine has recipes for a plain strawberry jam (just omit the vinegar) as well as a more sophisticated strawberry, balsamic vinegar and pink peppercorn jam (stir in a ¼ cup pink peppercorns after skimming off the foam). This version straddles the middle line yielding a jam that isn’t too hoity-toity for kids and PB&J’s, but also has a level of sophistication that makes it equally at home served with brie or other specialty cheeses.
12 cups washed and hulled strawberries
½ cup balsamic vinegar
1.75 ounces powdered fruit pectin (purchase where canning supplies are sold)
1/2 teaspoon unsalted butter
7 cups granulated sugar
Special equipment: boiling water canner with wire rack*, 9 (half pint (8-ounce)) canning jars**, ladle, jar lifter***, jar funnel, magnetic wand, spatula, gloves for jalapenos
Before you start the recipe, prepare your kitchen for canning. Clean and disinfect all countertops. Place the wire rack in the bottom of your boiling water canner* and place the mason jars (without their lids and wire rings) on the rack. Fill the boiling water canner with water (enough to cover the jars by 2-inches) and bring the water to a boil on the stove.
Fill a medium saucepan with water and add the lids (these need to be new, don’t reuse old ones) and rings (these can be used multiple times). Bring the water to a low boil and allow to boil for 15 minutes to sterilize the rings and moisten the lids to enhance sealing. You can use a smaller saucepan for this step, but I prefer to have a larger pot so that I can add the boiling water to my boiling-water canner if the water level gets to low. Adding boiling water instead of cooler tap water means you don’t waste time waiting for the water to return to boiling.
Once the boiling water canner is set-up, lay a clean dishtowel next to the canner and place your ladle, jar funnel, jar lifter, spatula, and magnetic wand on this towel. All of your equipment should be washed before continuing.
To make the jam, use a potato masher to crush the strawberries until you have 5 cups of crushed berries. Combine the crushed strawberries, balsamic vinegar, fruit pectin, and butter in a heavy-bottomed pot and bring to a rolling boil, stirring constantly. Once boiling, add the sugar all at once and stir to combine. Return the mixture to a rolling boil, and let boil, stirring constantly, for one minute. Remove the jam from the heat and skim off and discard any foam that has risen to the top using a metal spoon.
Check your boiling water canner to make sure that the water is boiling and that there is still enough water to cover the jars by 2-inches. If there is not enough water, add some water from the saucepan with your lids and rings. Return to a boil.
Remove the jars from the canner using your jar lifter. Pour any water back into the canner and set the sterilized jars on the clean towel. If using, place the jar funnel into a jar and ladle the hot jam into the jar leaving a 1/2-inch headspace (this refers to the space between the jam and the lid). Slide a spatula down the insides of the jar to remove any air bubbles. Use a clean, damp cloth to wipe the rim of the jar (this removes any jelly that might prevent proper sealing) and use your magnetic wand to pull a lid and ring out of the saucepan where they have been simmering.
Place the lid on the jar and then twist on the ring until it is just finger-tight. You want it to be tight enough so that it doesn’t fall off, but not so tight that air can’t escape which will prevent a proper seal. I twist the seal until I just encounter resistance; I don’t give it that final wrench that would seal it tight.
Repeat this process with the remaining jars. If you find that you don’t have enough jelly to completely fill your ninth jar, you can still process it as directed, but you’ll want to refrigerate it immediately after it cools for best preservation. While seemingly insignificant, correct headspace is important for safe canning.
Once all the jars have been filled, use the jar lifter to place them in the boiling water canner. Be sure that all of the jars are standing straight up. Be careful when adding and removing the jars that they don’t tilt sideways as this can prevent the seal from forming properly. Make sure that the water completely covers the jars.
Return the water in the boiling water canner to a boil. Process for 5 minutes; start timing when the water returns to a boil. Use the jar lifter to remove the jars from the boiling water canner and place them on a wire rack or a clean dishtowel to cool. Water from the boiling water canner will remain atop the jars when they are removed from the canner. Don’t tilt the jars to remove this. While bothersome, the water won’t bother anything and will evaporate soon enough.
You may hear the jars “pop” as they cool indicating that they have properly sealed. To double-check the seal, after the jams have cooled for one hour, gently press the middle of the lid. If it flexes back and forth, the jar has not sealed and processing should be repeated for another five minutes. Allow the jams to sit, untouched, on the wire rack for 24 hours. It may take up to two weeks for the jams to properly set.
Some final tips to keep in mind:
– Fearing botulism when I first started canning, I would over-process everything thinking longer is better. Over-processing foods can alter their final texture and as such, it’s important to process the jars just for the time indicated.
– Don’t mess with proportions. Always use recipes from a reputable source and do your homework before making adjustments. Safe canning depends on proper acidity and little tweaks can result in unsafe products.
______________
*While a boiling water canner allows you to can large batches at one time, you don’t have to have one. You can use a large pot with a lid. Line the bottom of your large pot with extra rings from mason jars. Much like the wire rack, mason jars will rest atop the wire rings allowing for good heat circulation.
** The size of the jar matters. Always use the jar size specified in the recipe as processing times are based on the jar size.
*** A jar lifter makes it easy to remove hot jars, but tongs with rubber bands wrapped around each tip makes a worthy substitute.

Love the jam. It is my jam. Haha.
LikeLike
[…] these scones on their own or top with your favorite jam. I’m partial to strawberry and balsamic jam. […]
LikeLike