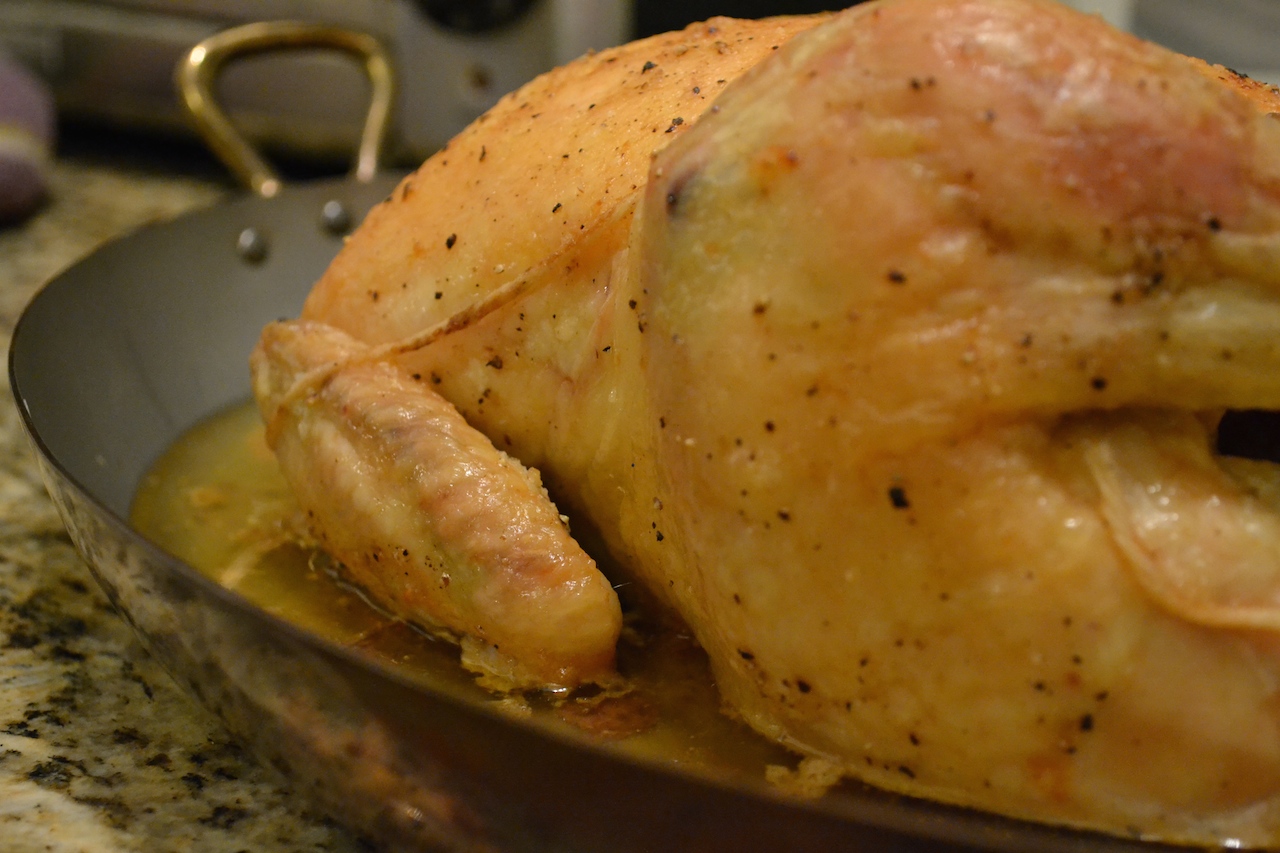
There are many ways to roast a chicken, but I stumbled upon this technique for slow-roasting chickens about a year ago and haven’t looked back. In the original recipe, it’s called faux-tisserie chicken, because while it’s not roasted on a spit, the chicken that comes out of your oven after three hours of cooking on low heat has the same crispy skin and wonderfully tender meat that you expect from a rotisserie chicken.
The long roasting time doesn’t bother me as I have no problem finding other things to do while my house fills up with the wonderful smell of roasting chicken. However, if you are short on time, use the same simple ingredients called for in the recipe below, but cook according to the instructions found in this roasted chicken recipe.

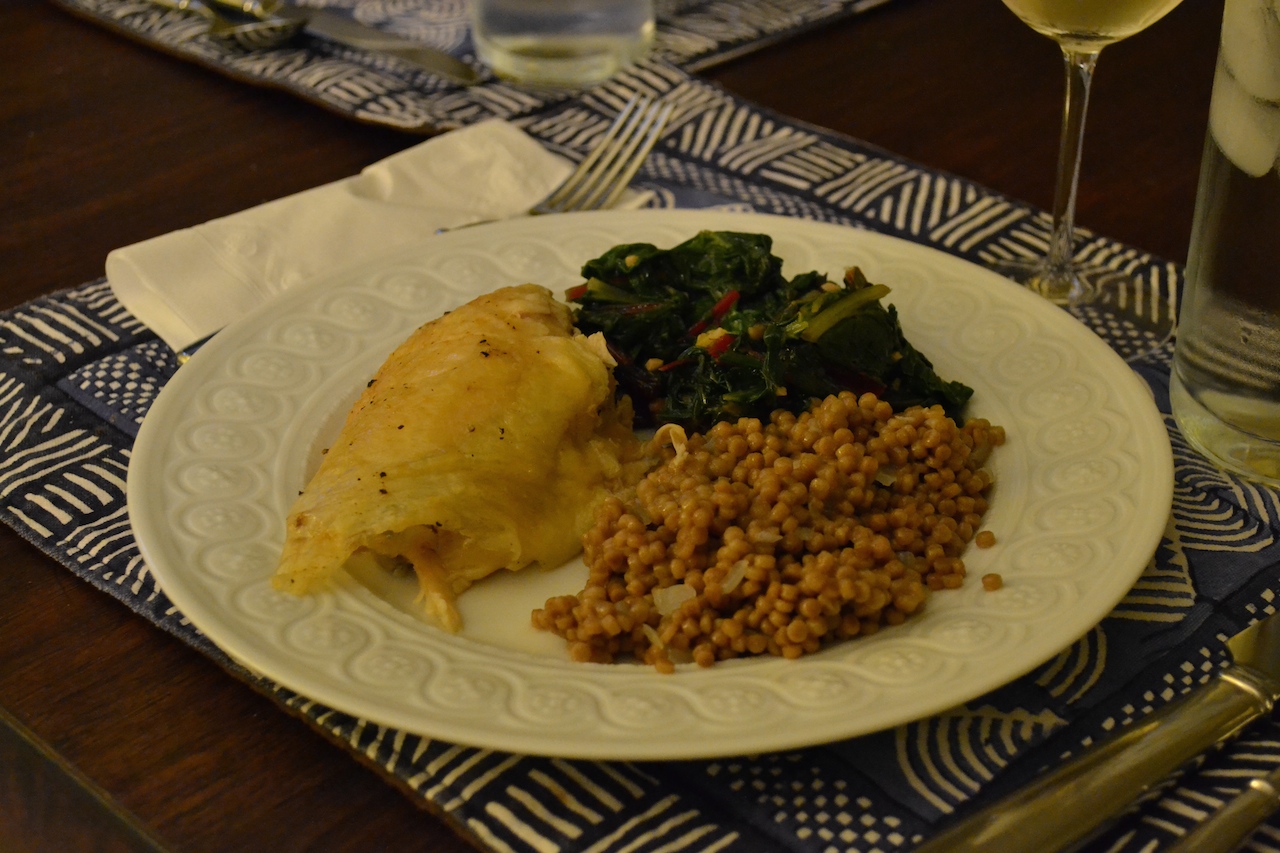
When I first told my husband about the chicken challenge, his response was “we are going to starve.” He has a dramatic streak, but I understood his fear. While he never expressed this fear again, it’s this first meal that requires some restraint on the part of the diner. We each only ate a thigh that first night. It was plenty of food with sides of sautéed rainbow chard and Israeli couscous, but we had to enlist some serious self-control to not go back for seconds. If feeling tempted, curb your cravings by nibbling on the crispy skin; you won’t be needing it for any of the other recipes (unless, you would like to include it).
After dinner, it’s time to get to work. A little work now saves lots of time later and I recommend ticking through this list to get your chicken ready for the week ahead.
1. Cut both breasts off the bone and remove the skin from each.
2. Cut one of the chicken breasts into 1/2-inch cubes and place in an airtight container or Ziploc bag labeled “pot pie.”
3. Use a fork to shred the meat from the second chicken breast and place it in an airtight container or Ziploc bag labeled “chicken salad.”
4. Pull the meat off the drumsticks and wings. Pick off additional meat from the chicken carcass. Divide this chicken meat in half. Place half in an airtight container or Ziploc bag labeled “Noodle Soup.” The other half should be placed in an airtight container or Ziploc bag labeled “BBQ Pizza.”
5. Do you need to freeze any of the chicken? I ate the chicken salad for lunch and as a result, was able to use up all the chicken meat in 4 days. If you won’t be able to make all the meals in the next four days, freeze whatever meat you won’t be using for later use.
6. If making carcass stock right away, proceed with directions below. Otherwise, place the carcass and any leftover bones in a ziploc bag.

7. Don’t clean that pan! If planning to make carcass stock immediately, pour the pan juices and fat from roasting the chicken into a measuring cup. The fat will float to the top and can be skimmed off with a spoon; reserve the fat and refrigerate for use in the chicken pot pie recipe. Add the pan juices, without the fat, to the stock pot. If making stock later, pour the pan juices and fat into an airtight container and refrigerate. When ready to make stock, skim the chicken fat off the top (see photos) and reserve. Add the pan juices to the stock pot. Don’t be alarmed if the reserved pan sauces resemble jello. This is a good sign and indicates that your stock has lots of body.


8. Relax. Or, if plunging ahead with carcass stock, get back to work. Happy cooking!
Slow-Roasted Chicken – Printer Friendly Recipe
Serves 4 for dinner
Many of us think that washing a raw chicken is an essential part of the prep. That’s not the case. Rinsing a raw chicken can be dangerous and the FDA warns against the practice. Why? Cooking chicken to a temperature of 165 degrees F will kill any harmful bacteria. Rinsing doesn’t do anything, but potentially cross-contaminate other surfaces.
1 (4 ½ lb) whole chicken, trimmed and giblets removed
2 tablespoons olive oil
1 tablespoon salt
1 teaspoon freshly ground black pepper
Special equipment: kitchen twine
Preheat the oven to 300 degrees F and place a rack in the center of the oven. Rub the chicken all over with the olive oil. Sprinkle the chicken with the salt and pepper being sure to season the cavity.
Place the chicken in a small roasting pan or a baking sheet that is just slightly larger than the chicken. *
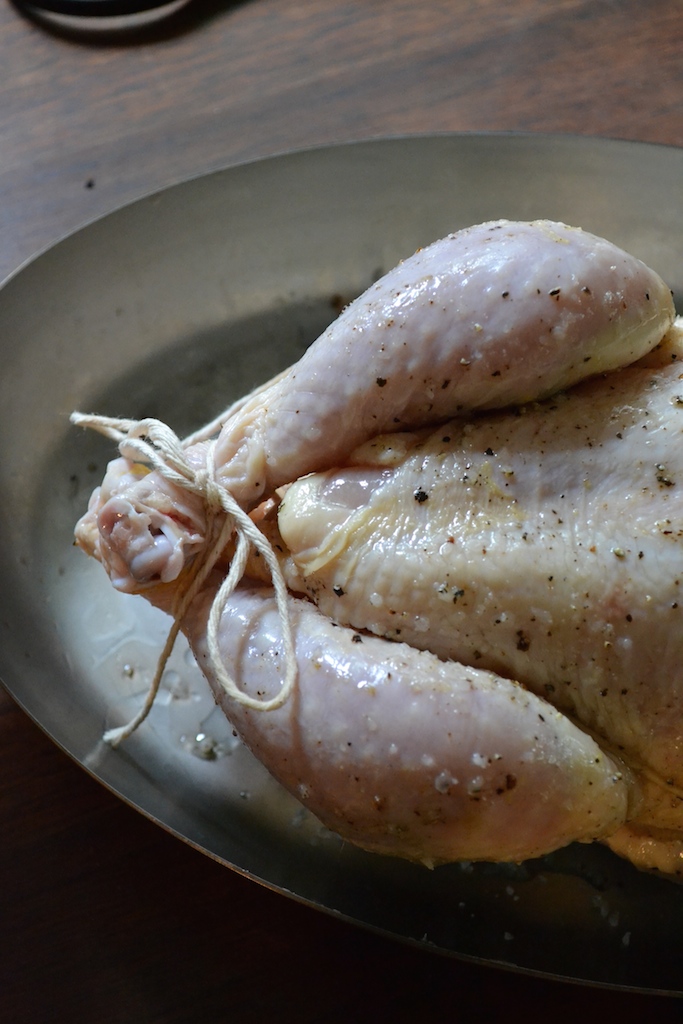
While trussing is not necessary, it does allow for more even cooking of the chicken. To truss the chicken, cut a long piece of twine. Turn the chicken so the cavity is facing you and the breasts face up. Loop the twine around the wings and secure them to the breasts by pulling the twine tight.
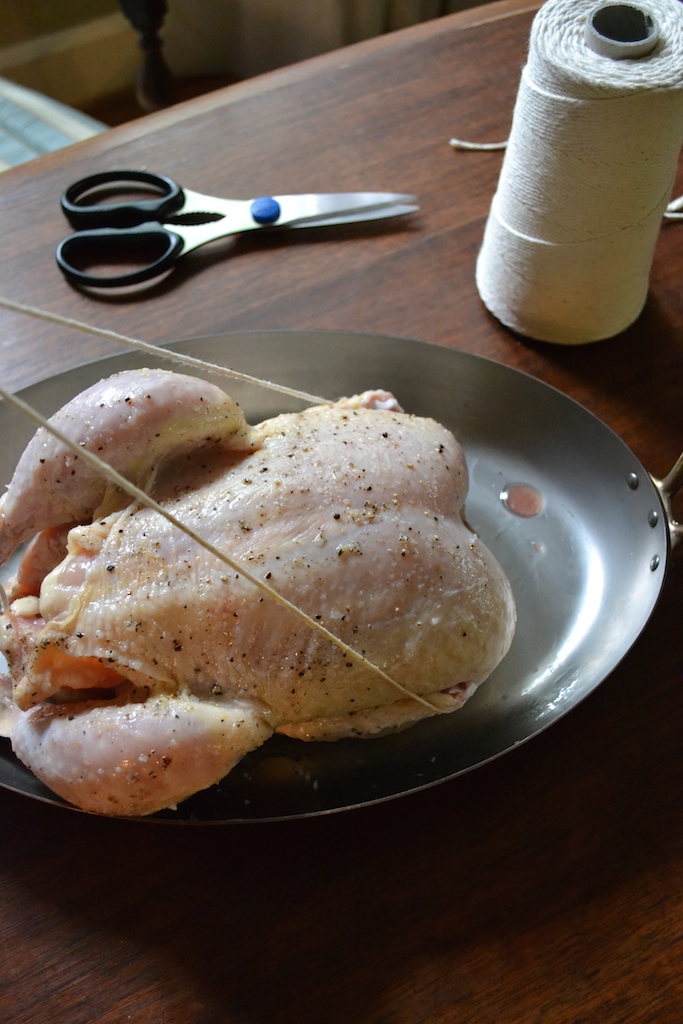 Cross the twine in front of the cavity, at the bottom of the breasts, and then pull the twine up around both legs.

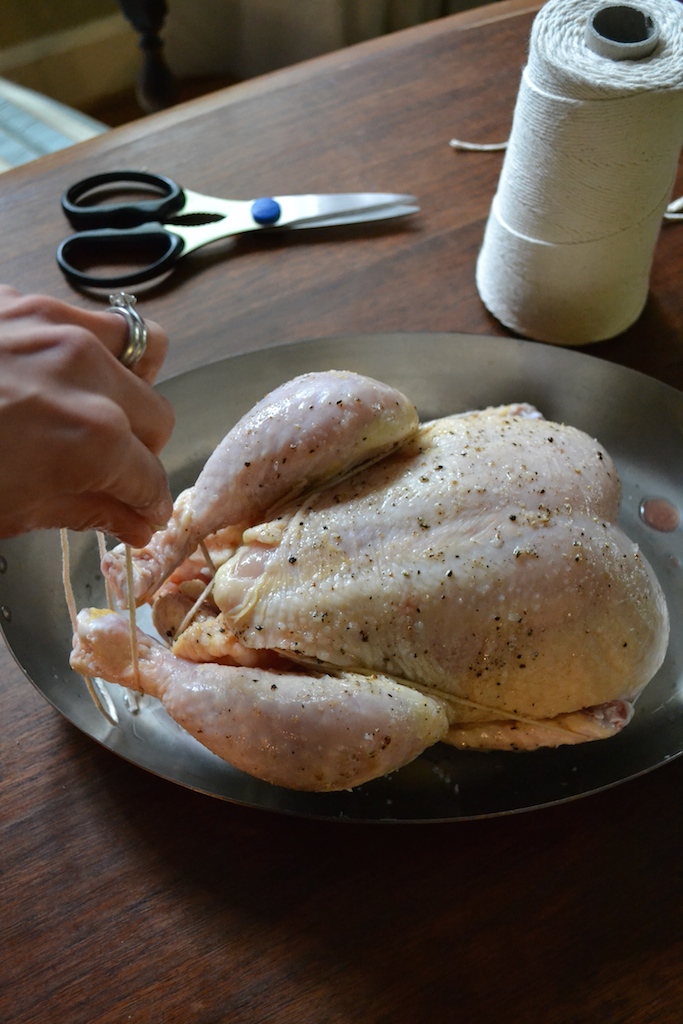 Tighten to pull the legs together and tie the twine in a bow to secure.
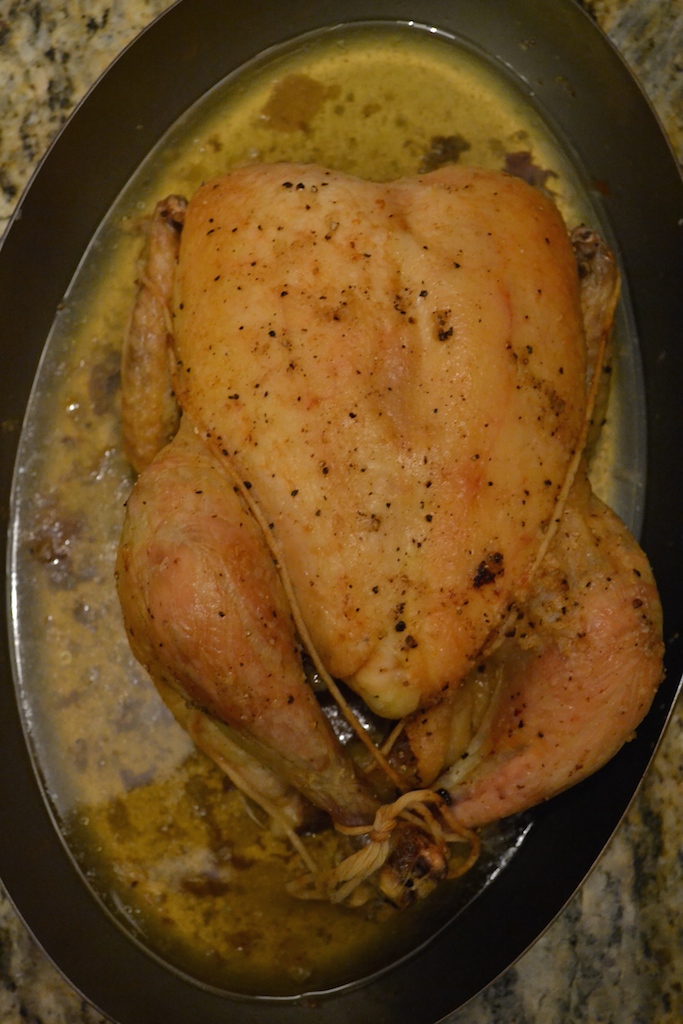
Roast the chicken for 3 hours, basting with the rendered juices and fat every hour. Remove the chicken from the oven and let sit for at least ten minutes before carving. Gravy can be made using the juices and fat from the pan or reserve it in a jar and refrigerate for use in carcass stock (see below).
* This is important, because if the roasting pan is too large, the fat and juices from the chicken will evaporate during cooking and cause the pan to start smoking. If you only have a large roasting pan or baking sheet, make it smaller by folding the edges of a sheet of aluminum foil up to create a makeshift smaller pan and placing it on the baking sheet. Place the chicken atop the foil pan and proceed as directed.
Carcass Stock – Printer Friendly Recipe
Save the carcass and bones from your roast chicken to make carcass stock. Place any leftover bones in a large stockpot and cover with 10 cups of cold water. If you reserved the juices and fat from the roasting pan, skim the fat off the chicken juices and reserve for another purpose. Pour the pan juices into the stockpot.
Slowly bring the stock to a boil. Reduce the heat and let simmer for 3 hours. Strain the carcass and bones from the stock to yield approximately 4 cups of stock. Refrigerate and use within three days or freeze for up to 3 months. If freezing, portion the stock into 1 or 2 cup quantities so you don’t have to use it all at once.
To find out more about the chicken challenge, click here. For tomorrow, get hungry for chicken salad with artichokes and walnuts and a belly-warming recipe for chicken pot pie.
